As a homeowner who takes pride in maintaining the aesthetic appeal and functionality of my dwelling, the discovery of a damaged panel on my garage door presented a challenge. Faced with the dilemma of whether to replace the entire door or attempt a more targeted fix, I embarked on a journey of exploration.
In this comprehensive guide from Garage Door Repair, join me as we unravel the intricacies of replacing damaged panels on a garage door, discovering the possibilities and considerations that can breathe new life into this crucial element of home exteriors.
1. Assessing the Damage: The First Step to Restoration
The journey of replacing a damaged panel begins with a thorough assessment of the extent of the damage. Small dents or scratches may be candidates for repair, while more severe damage, such as a large dent or a puncture, might warrant panel replacement. Take the time to closely inspect the affected panel, considering factors such as the material of the door, the nature of the damage, and its impact on the overall structural integrity.
2. Identifying the Garage Door Material: A Key Determinant
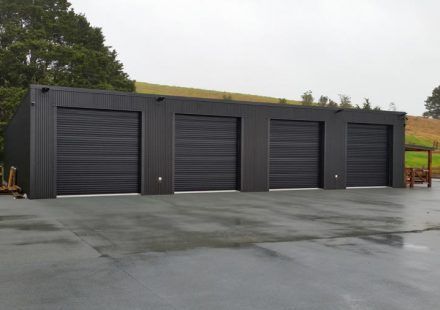
Garage doors come in various materials, each with its unique characteristics and considerations for replacement. Common materials include steel, aluminum, wood, and composite. Identifying the material of your garage door panel is a crucial determinant in the replacement process. Steel and aluminum panels are often interchangeable, but the process differs when dealing with wood or composite materials. Understanding the composition of the damaged panel guides the next steps in sourcing a suitable replacement.
3. Exploring Repair Options: When Replacement Isn’t Necessary
Before diving into the world of panel replacement, exploring repair options is prudent. Small dents or scratches, particularly on steel or aluminum doors, may be candidates for repair rather than outright replacement. DIY dent removal kits, available at many hardware stores, can be effective for minor damage. For larger or more complex repairs, consulting with a professional garage door repair service ensures that the damage is addressed with precision.
4. Contacting the Manufacturer: A Source of Authenticity
If replacement becomes inevitable, reaching out to the original manufacturer of the garage door is a valuable step. Manufacturers often keep records of door specifications and can provide guidance on sourcing authentic replacement panels. This ensures that the new panel aligns seamlessly with the existing door in terms of material, color, and design. Authenticity not only preserves the door’s aesthetic but also contributes to its overall structural integrity.
5. Measurements and Specifications: Precision Matters
Replacing a damaged panel requires precision in measurements and specifications. Accurate measurements of the damaged panel, including its height, width, and thickness, are essential for sourcing a replacement that fits seamlessly. Additionally, note any design features, such as panel patterns or window cutouts, to ensure that the replacement aligns with the overall aesthetic of the garage door.
6. DIY vs. Professional Replacement: Weighing the Options
The decision to embark on a do-it-yourself (DIY) panel replacement or enlist professional help depends on various factors. DIY replacement may be feasible for those with a knack for home improvement and the necessary tools. However, professional replacement offers expertise, efficiency, and a guarantee of proper installation. Consider factors such as your comfort level with DIY projects, the complexity of the replacement, and the desire for a seamless, professional finish when making this decision.
7. Removing the Damaged Panel: A Delicate Operation
If you opt for a DIY replacement, removing the damaged panel is a delicate operation. Start by securing the garage door in the open position to prevent accidents. Depending on the door’s construction, removing the damaged panel may involve releasing tension from the torsion springs, unscrewing hinge bolts, or detaching brackets. Exercise caution, follow safety guidelines, and use appropriate tools to ensure a smooth and secure removal process.
8. Preparing for Replacement: Sourcing the Right Panel
With the damaged panel removed, the next step is sourcing the replacement. This involves contacting suppliers, manufacturers, or local garage door dealers to find a panel that matches the specifications of the original. Consider factors such as color, texture, and any additional features to ensure a harmonious blend with the existing door.
9. Installation Process: Aligning and Securing
The installation of the replacement panel is a critical phase in the restoration process. Begin by aligning the new panel with precision, ensuring that it sits flush with the adjacent panels. Secure the panel in place by reattaching hinge bolts, brackets, or any other fastening mechanisms. Exercise care to avoid causing additional damage during the installation process.
10. Painting and Finishing: Seamlessness in Aesthetics
To achieve a seamless aesthetic, painting and finishing the replacement panel are essential steps. Match the color and texture of the existing door, taking care to blend the new panel with the surrounding surfaces. Using the same type of paint and finish ensures uniformity. Allow adequate drying time before testing the door to ensure that the replacement panel integrates seamlessly.
11. Testing and Adjustments: Ensuring Proper Functionality
Once the replacement panel is securely in place, conduct thorough testing to ensure proper functionality. Operate the garage door through its full range of motion, paying attention to any unusual sounds, misalignments, or resistance. Make necessary adjustments to hinge bolts, brackets, or other components to achieve optimal performance. Testing ensures that the door operates smoothly and that the replacement panel has been integrated effectively.
12. Considerations for Multiple Panels: When to Replace the Entire Door
In cases where multiple panels are damaged or if the door has reached the end of its lifecycle, replacing the entire door might be a more practical solution. The uniformity in material, color, and design achieved through replacing the entire door ensures a cohesive and polished look. Consider the overall condition of the garage door and weigh the cost and effort of multiple panel replacements against the benefits of a fresh, unified appearance.
Conclusion: Breathing New Life into Garage Doors, One Panel at a Time
Overall, according to Garage Door Repair and as I navigated the process of replacing a damaged panel on my garage door, I discovered that this endeavor goes beyond mere restoration; it’s a journey of breathing new life into a crucial element of home exteriors. Whether opting for repair, replacement, or considering the condition of the entire door, the key lies in informed decisions and meticulous execution. Here’s to a year of garage door transformations, where damaged panels become opportunities for revitalization, and the timeless elegance of well-maintained exteriors stands as a testament to the commitment to homeownership. Cheers to the journey of restoring garage doors, one panel at a time.
Brothers Garage Door Service
29522 Wentworth St, Livonia, MI 48154, United States
734-292-0971